How to Install SwiftSeller 2.0 Beta
In this article we'll show you how to join the Beta
If you've been invited to join the exclusive Beta testing group for SwiftSeller 2.0, follow the instructions below to get started.
Step 1: Install TestFlight
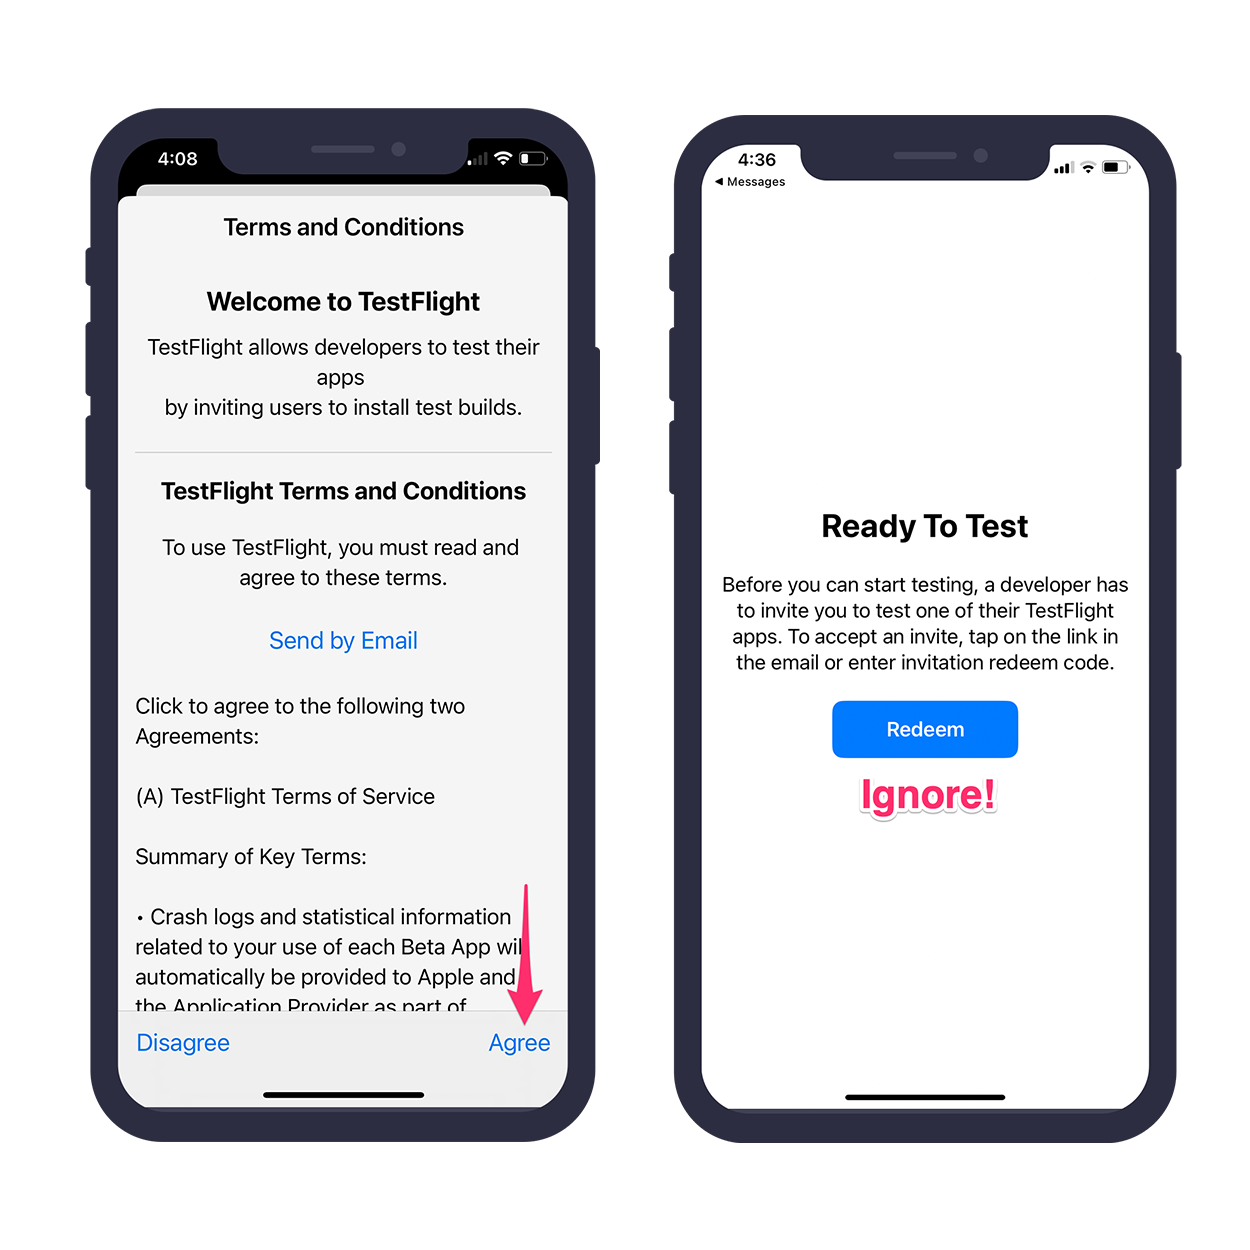
Head to the App Store and install the TestFlight app by clicking the link here.After you have installed TestFlight open the app. You should be presented with a Terms and Conditions screen. Tap Agree in the bottom right corner of the screen. After you agree to the terms, you should be presented with a screen asking you to redeem a code. Please ignore this - DO NOT put the invite code you received in the email here.
Step 2: Install the SwiftSeller Beta
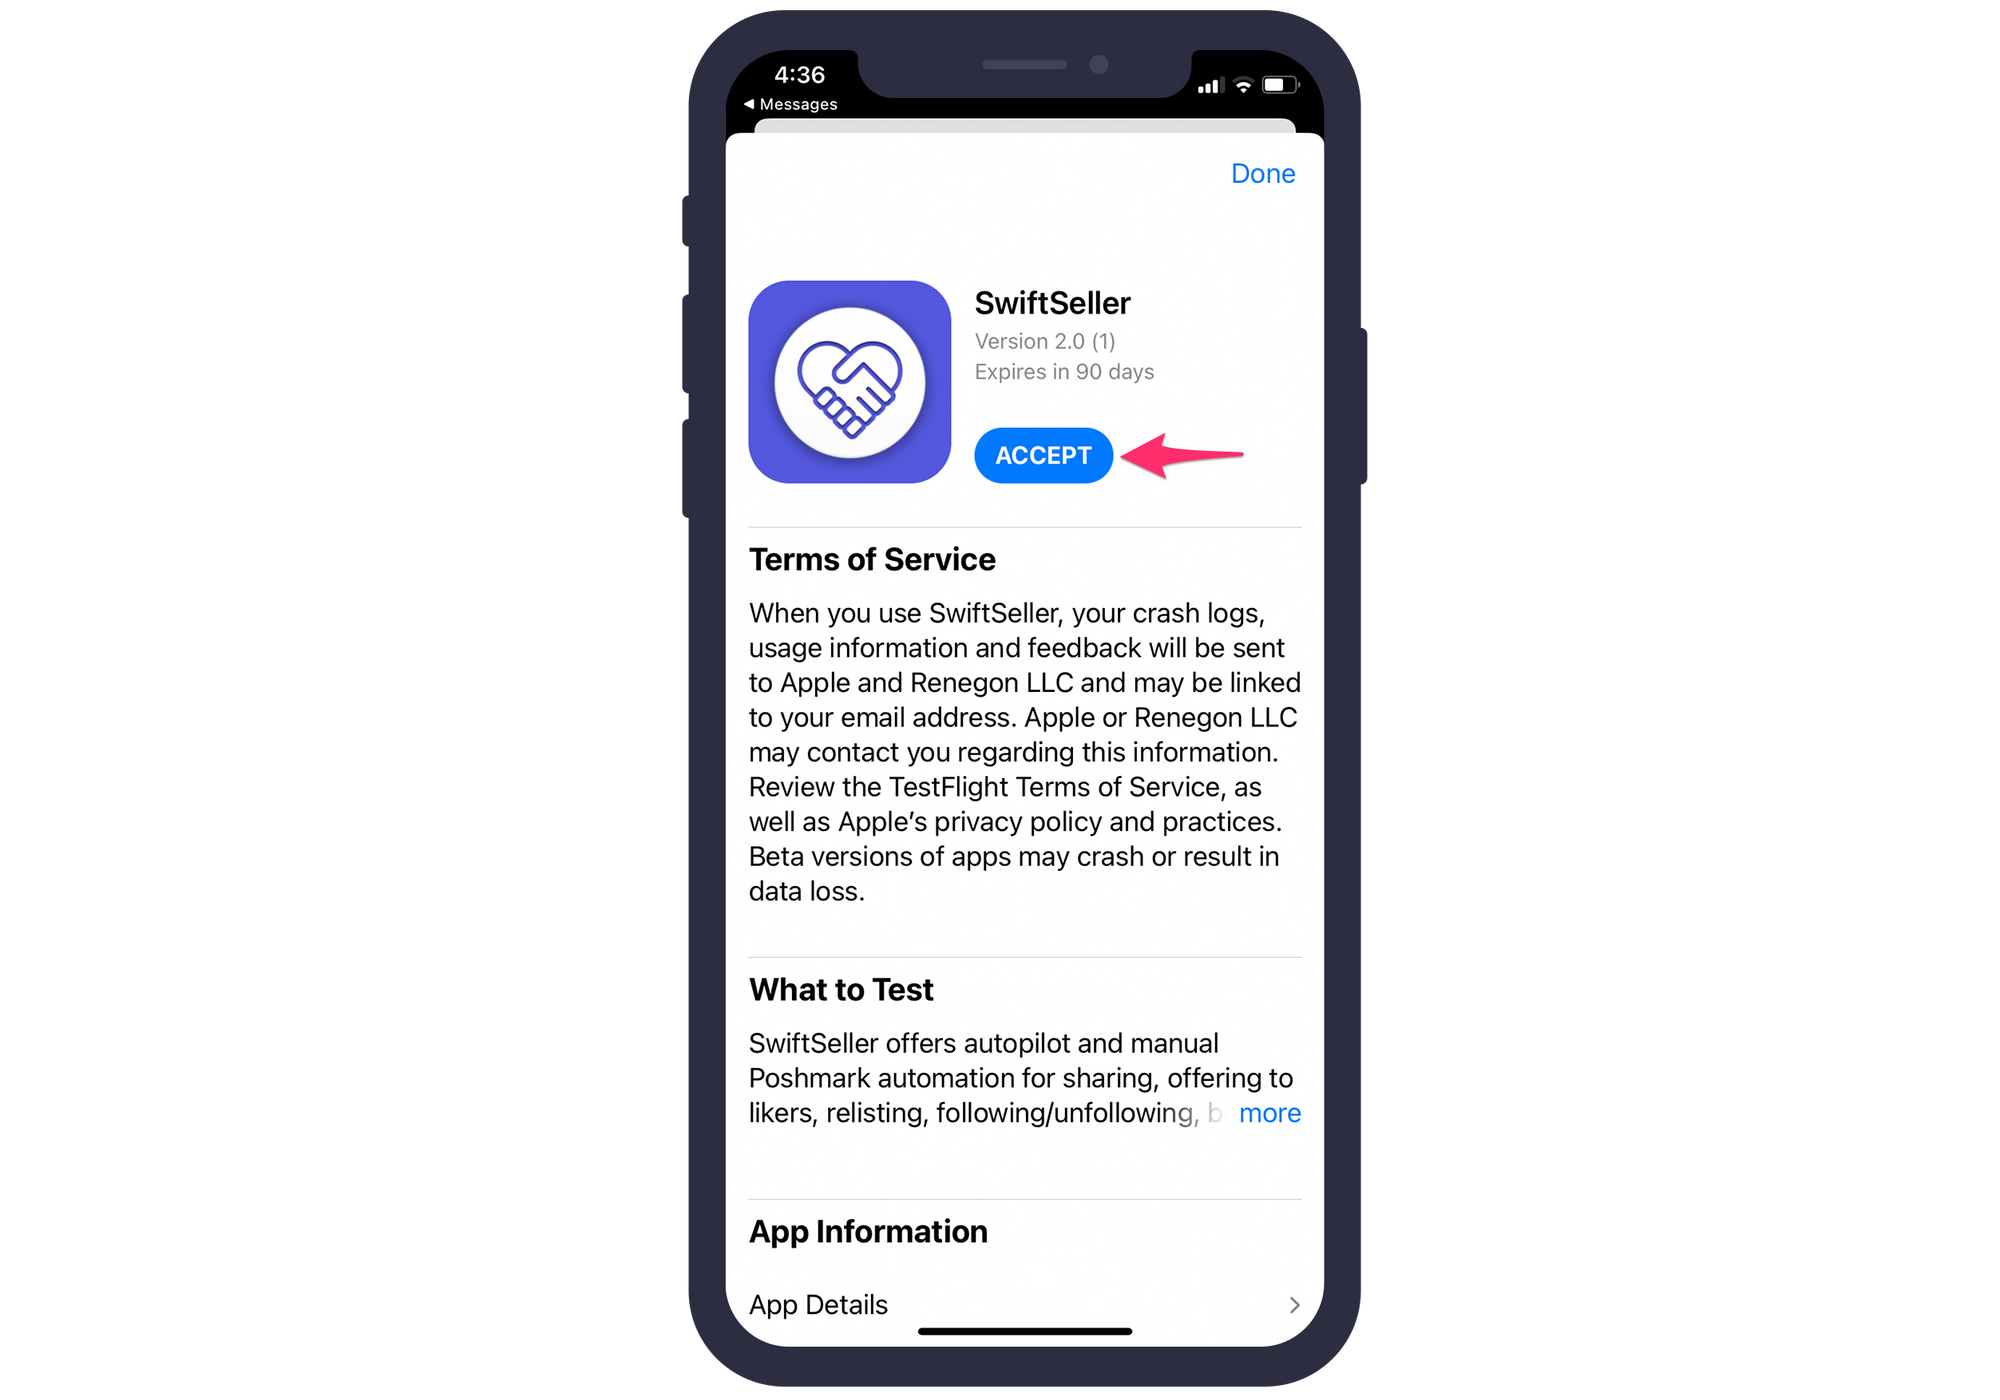
Now that TestFlight has been installed, tap the link here to install the SwiftSeller beta.After you tap the link should be presented with a screen below. Tap Accept and then Install. SwiftSeller should then begin installing. The Install button should turn into an Open button. Tap Open or go to your home screen and find SwiftSeller.
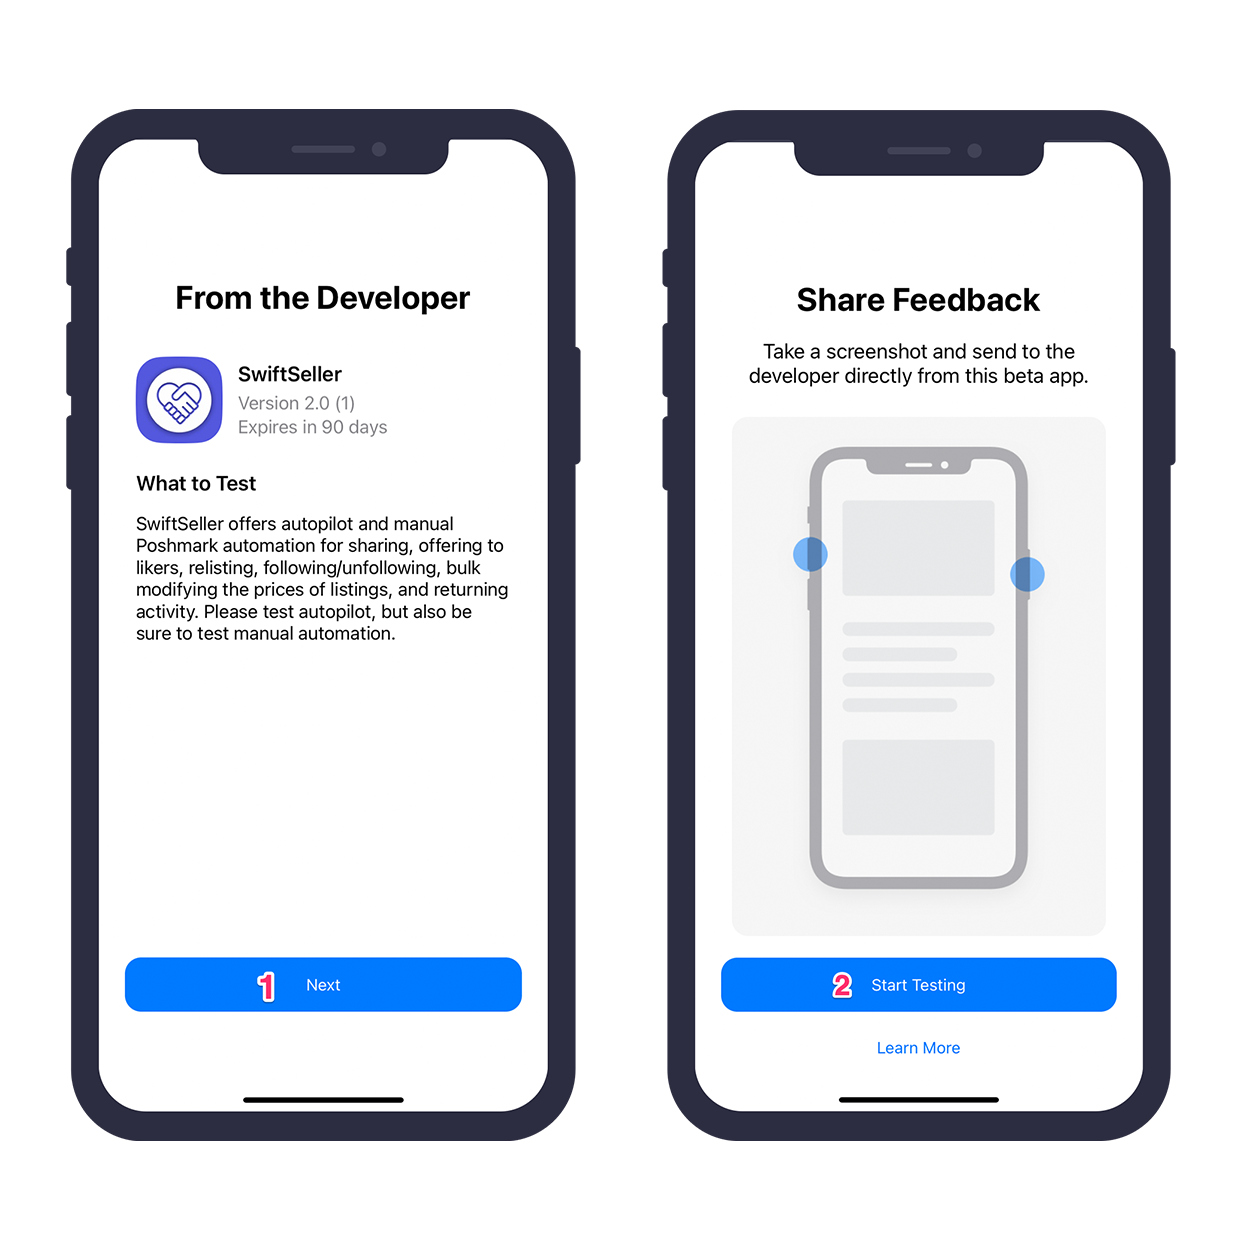
When you first open SwiftSeller, you'll find notes from us that look like the screens below. Tap Next in the first screen and Start Testing in the second screen.
Now, you'll be presented with a screen asking for your phone number. SwiftSeller requires your phone number to create an account. Creating an account with us allows you to securely manage your automation. We will never send you marketing texts or spam. Don't worry, we hate spam too. After you enter your phone number, a page should show asking for the verification code. You should receive a text message with the verification code.
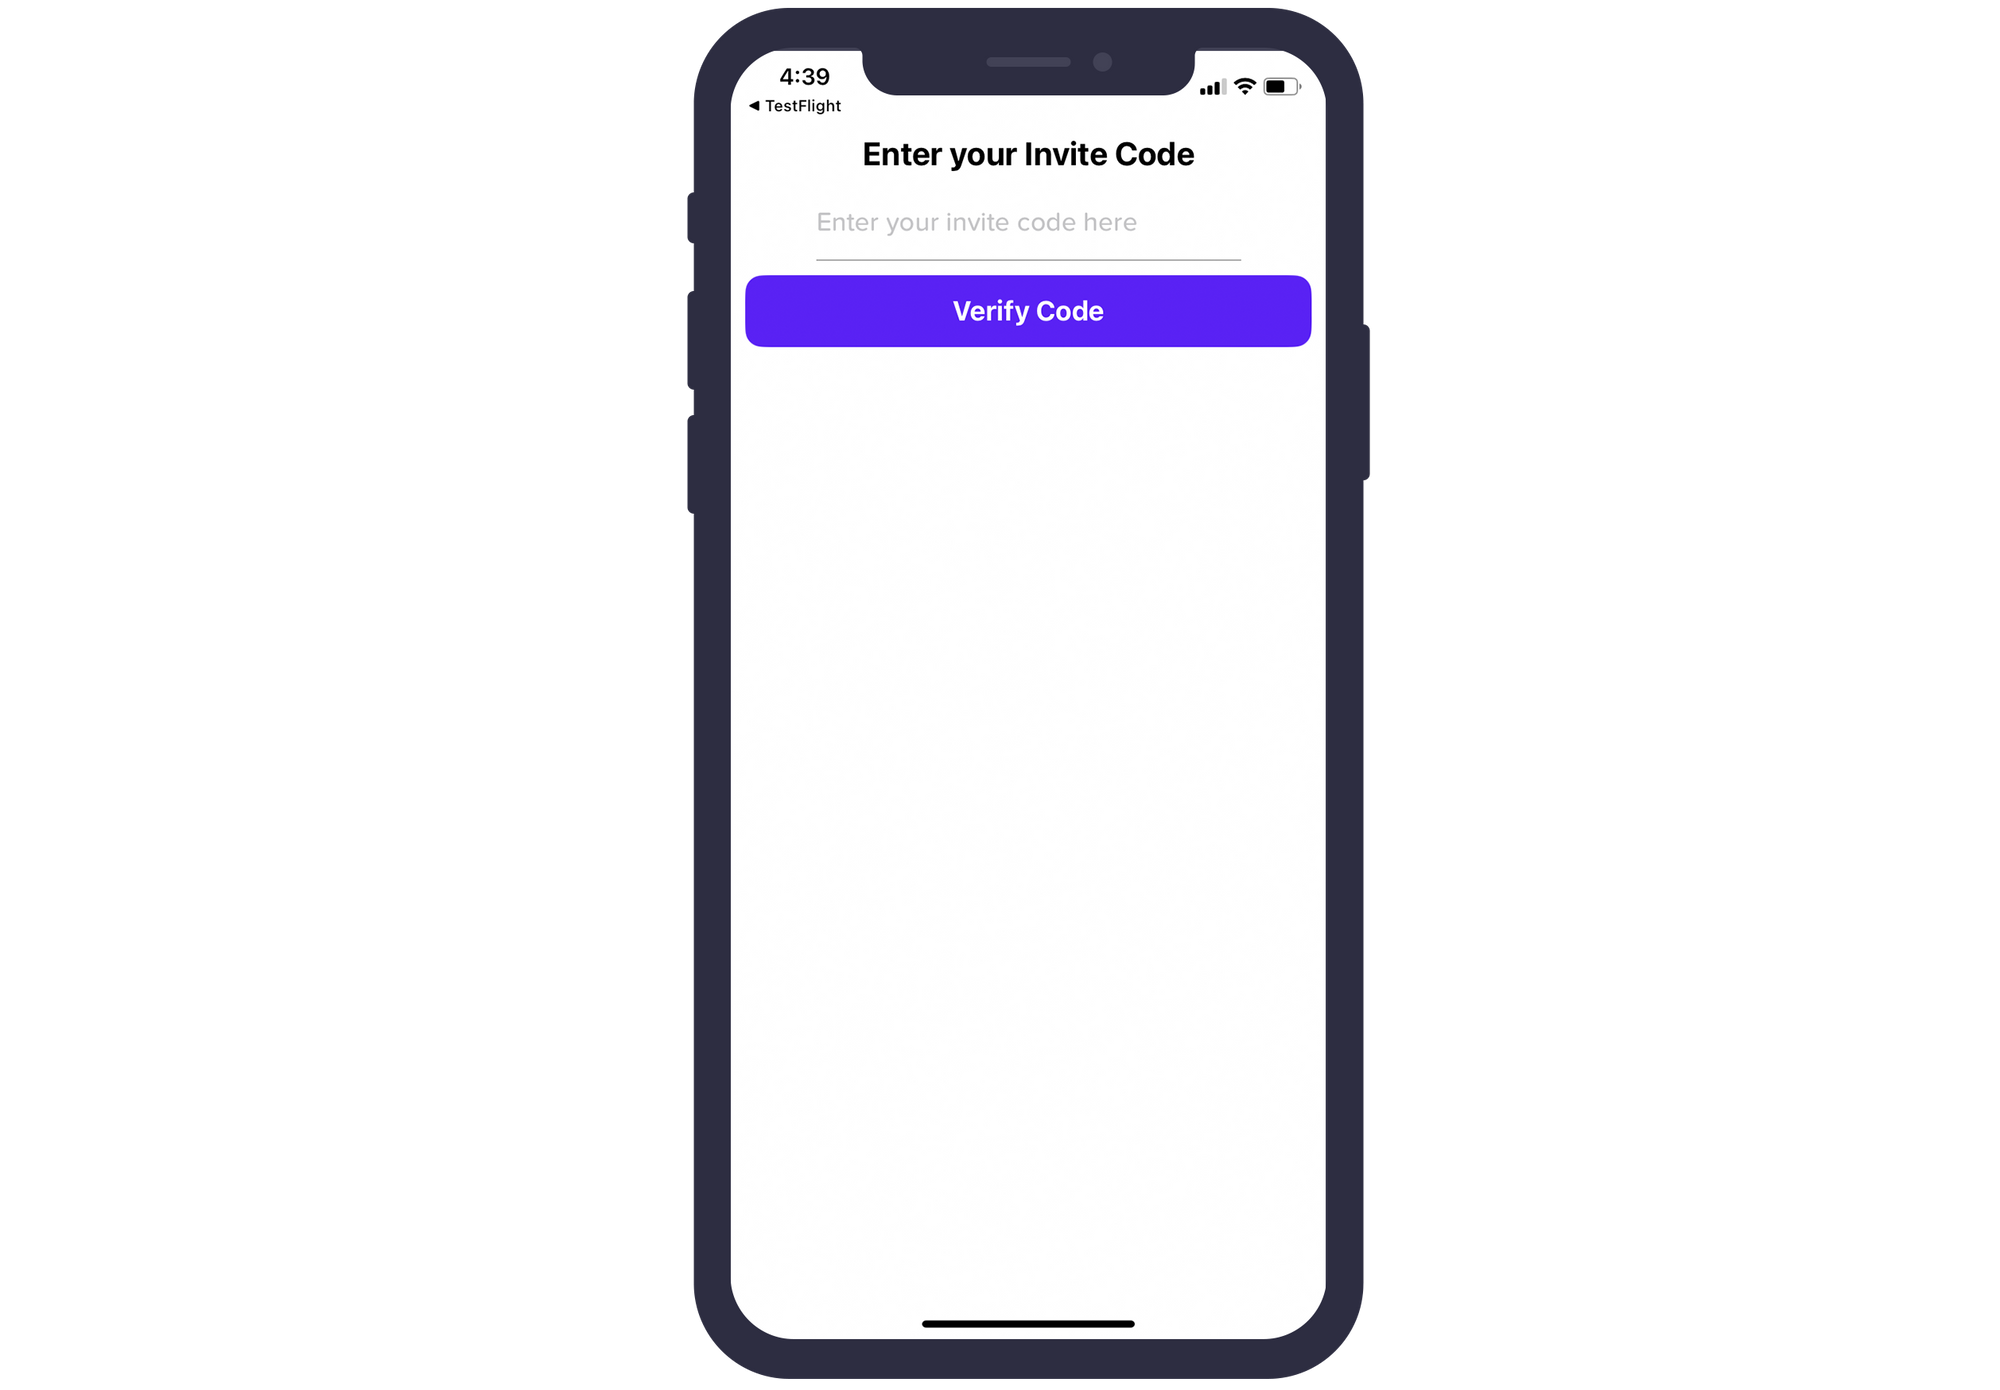
After you have entered your verification code, you will be asked for an Invite Code. This is NOT the verification code you received in the previous step. The Invite Code is a special code we sent you in the original invite email. Copy that code and paste it in the field. The code is case sensitive - so make sure it matches with what we sent you.
After you successfully entered your invite code, you will be asked if you want to enable Push Notifications. Hit Enable. If you do not enable this, then you will not receive notifications when we run into problems sharing, offering to likers, etc. Not enabling notifications is highly discouraged, as it is one of our few ways of directly communicating with you.
After you selected your notification preferences, you will be presented with a screen below that asks you if you want to enable SwiftSeller Autopilot. SwiftSeller Autopilot performs automation on your behalf without you having to manually go into the app. If you would rather manually share to followers/parties, offer to likers, relist, then feel free to skip this step. Some users have reported receiving an error after turning the switch for Automatic sharing. If you encounter an error, just hit Retry.